
Wednesday, December 12, 2012
Final Project Grayscale
Wednesday, December 5, 2012
Landscape Matte Painting

Monday, December 3, 2012

Wednesday, November 28, 2012
Matte Painting Cliff...

Monday, November 26, 2012
Inking Project, Finished.
.jpg)
Monday, November 19, 2012
Inking Self-Portrait

Monday, November 12, 2012

Wednesday, November 7, 2012

Monday, November 5, 2012
Photo Color Correction

Monday, October 29, 2012
Adjustment Layer Assignment

This is my completed assignment. The background was the hardest to adjust as it would block out a portion of my work. I used the Bevel along with some Inner & Outer glow. I also used the Brightness, Hue & Level Adjustment Layers among others.
Wednesday, October 24, 2012


Monday, October 22, 2012
GD2 Project 2


My second Project in Game Design II. The fruit was somewhat troublesome and the hair was a slight pain. I used the Magic Wand tool along with Quick Masking to separate the subject from the background.
Friday, June 8, 2012


Wednesday, April 18, 2012
Completed...

And this is the finished product. I used inner and outer glow to create the neon sign along with the glowing footsteps. I painted the trashcans and blended the colors together, and use gradient layers along with clouds to develop the fog-like scene. I used adjustment layers to change the scene from day to night.

Monday, April 16, 2012
My Matte Painting Final premise...

This is the photo I'll be working on for my final. My hope is to give it a full transformation...
Monday, April 9, 2012
My London Tower Matte...

This is the finished product of my work. I used Adjustment Layers of Hue/Saturation, Brightness/Contrast, Levels and Curves to match the look for nighttime. I then added a Photo Filter and Defringe to finely tune it.
Monday, April 2, 2012
My Planet Matte...
 This is the finished product of my work. I used Gradient Overlay to give the background a cosmic feel, and added three layers of clouds to reduce the blackness in the background. I used the burn tool and a color balance on Jupiter itself, and an outer glow on the shine coming off the planet, before adding a dulled and faded ray of light.
Wednesday, March 21, 2012


Monday, March 19, 2012
My Recent work in GD2...

I was able to complete this work in 2 hours 30 minutes, most of which was spent fine-tuning and checking for any errors I made. The work itself is made of four layers, and I used the erase tool, the quick select tool and the Layering Option to complete this.
Wednesday, March 14, 2012
My Work on Blending...

Wednesday, February 29, 2012
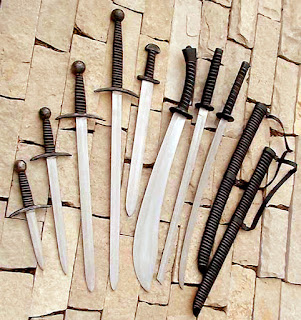
My Work on Photoshop Quick Masking...
I began by using the Curves option in PhotoShop to color-correct the original image of the swords by using the handle for the darkest part, the blade for the lightest, and a shaded part of the blade for the gray. I then used the Quick Mask Tool to cut the 5 swords I wanted out of the photo, and inserted them into a Japanese Forest image.


Tuesday, February 14, 2012
Subscribe to:
Posts (Atom)